How to Draw a Self-Portrait A Step-by-Step Guide. When creating art, there are many different subjects that you can choose to focus on. These have included everything from landscapes to food, but one of the most common subjects to draw should be the self-portrait. After all, all you need is a mirror, and your reference material is available at all times! Drawing a self-portrait is a great way to start practicing and hone your drawing skills. This tutorial will show you how you can create these types of selfies. We hope you enjoy working through this step by step. Step-by-step guide on how to draw a self-portrait in just six steps!
Also read: dinosaur coloring page
How to Draw a Self-Portrait Let’s Get Started!
Step 1
In this guide on drawing a self-portrait, we will draw a picture of a young woman as an example. Even if you look nothing like her in real life, you can follow the steps and tricks we’ll use to create your selfie. First, you will need a facial contour. You can see how we use a curved line for the chin, cheeks, and jaw lines. You can also use similar lines to mimic your facial features. We then used larger shapes for her eyes to create a more stylized look. His nose, lips and eyebrows are drawn using simpler lines and shapes. Finally, use some wavy lines to make her hair fall over her face, and then we can move on to step 2.
Step 2
When drawing a human being, getting your hair done correctly can be one of the hardest parts. Try reducing the shape of your hairline and how it interacts with the rest of your face. If you have very little hair, you will focus more on the head’s shape than on representing the hair’s flow.
Step 3
For the third step of this guide on drawing a self-portrait, we will focus on the next section of her hair. All you need to do for the next part is add the same curved and wavy lines you used for the rest of the hair. This will help when creating the section of hair close to the head’s back. We’ll finish the final section of her hair when we move on to the fourth step in the guide!
Stage 4
As mentioned in the previous step of this self-portrait drawing, we will finish the last section of her hair in this part. This part will take care of the curls of hair that fall around your neck. These sections of your hair will be even more wavy and curly than the other sections. When working on your self-portrait, try to spot any common shapes that might be represented in your hairstyle.
Step 5
We’ll stop drawing her hair when we start this fifth step of our how-to-draw a self-portrait guide. For this part, we’ll draw the top of his shirt. To do this, use some curved lines to draw your shirt openings. Then we’ll add horizontal line details to the shirt to finish it. If you’re drawing your self-portrait, you can draw the top of whatever clothes you wear. Then we can get to the final details in the next step of the guide!
Step 6
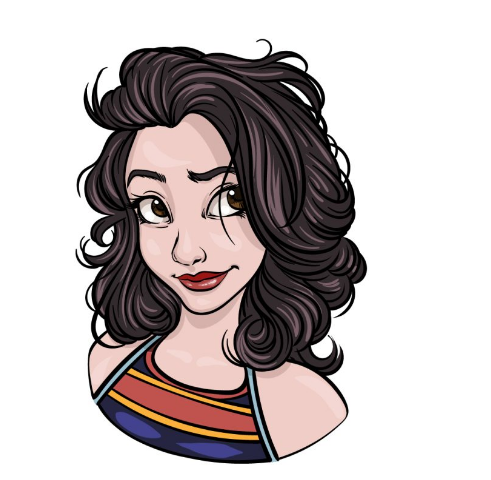
This part of your self-portrait drawing should be nice and easy to do! For this part, we’ll draw her shoulders to finish this portrait. This can be done using some simple curved lines. You could also draw more of her arms if you wanted this portrait to show more of her. The final step will attempt to finish up some colours, but before you continue, you can also add your final details! These could include a background; if you had to, you could use your surroundings for inspiration. If you’re drawing yourself, you can add smaller details to your clothes or other elements like tattoos, piercings, or the like. Then we can continue to the final step!
Step 7
Now you can close this guide on how to draw a self-portrait with some colouring fun! Use any other colours you like for this image when colouring your version. If you use these steps to draw yourself, you can use your various artistic mediums to represent the colours you see in the mirror accurately.