Mirrors can be a great way to add an extra touch of style and decor to your home, but they can also be tricky to install. In this article, we’ll be breaking down the step-by-step guide to installing mirrors in your home. From picking the type of mirror you’d like to mount, to properly securing it in place – we’ve got all the information you need for a successful installation!
What is Mirror Installation?
Installing mirrors in your home can be a great way to add light and style. But before you start, it’s important to know what kind of mirror installation is right for your space.
There are three main types of mirror installation: flush-mount, semi-flush-mount, and recessed-mount. Flush-mount mirrors are the simplest to install and are great for small spaces. Semi-flush-mount mirrors are slightly more difficult to install but offer a more stylish look. Recessed-mount mirrors are the most difficult to install but offer the most polished look.
Once you’ve decided on the type of installation you want, follow these steps:
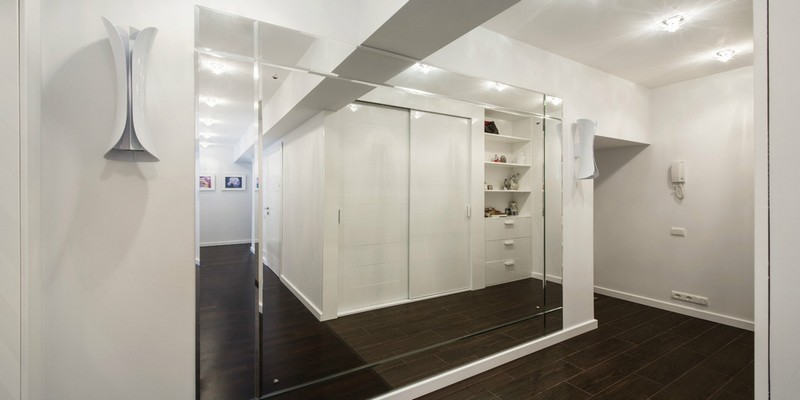
Choose the location for your mirror. The best place for a mirror is usually opposite a window, as this will reflect natural light into the room. If you don’t have a window, another good option is near a door or along a narrow hallway.
Mark the position of the hangers on the back of the mirror using a pencil or chalk. The hangers should be spaced evenly so that the mirror is level when hung.
Drill pilot holes at the marks on the back of the mirror using an electric drill fitted with a bit that’s slightly smaller than the screws you’ll be using to hang the mirror. Be careful not to drill too deeply, as you don’t want to damage the wall behind the mirror.
Screw in wall anchors
Tools Needed for Mirror Installation
If you’re looking to add a touch of elegance to your home, then installing mirrors is a great way to do it. But before you start, there are a few tools you’ll need to get the job done right. Here’s what you’ll need:
A tape measure: This will come in handy for measuring both the wall space where you’ll be hanging the mirror as well as the mirror itself.
A level: You want your mirror to be level, so make sure you have a level on hand.
A drill: You’ll need this for making any necessary holes in the wall for mounting the mirror.
Mirror mounts: These are what you’ll use to actually attach the mirror to the wall. Make sure you get ones that are appropriate for the size and weight of your mirror.
A hammer: This may not be strictly necessary, but it can come in handy if you need to tap any nails or screws into place while mounting the mirror.
Step-By-Step Guide to Installing Mirrors
Installing mirrors in your home can be a great way to add light and create the illusion of more space. Here is a step-by-step guide to help you get started:
Decide where you want to install the mirror. Measure the area and make sure you have enough space for the size of mirror you want to install.
Choose the type of mirror you want to install. There are many different types of mirrors available, so take some time to decide which one will best suit your needs.
Hang the mirror using screws or nails. Make sure the mirror is level before securing it in place.
Add any finishing touches, such as frames or decorative hooks.
Use a level when hanging the mirror to ensure it is straight. Use a tape measure to measure the area where the mirror will be hung and mark the location with a pencil. Center the mirror on the marks.
For large mirrors, it is best to have someone help you hold the mirror in place while you secure it. For smaller mirrors, use adhesive strips or putty to attach the mirror to the wall. Make sure that the adhesive will not damage the finish on your mirror or walls.
Securely fasten all hardware used to hang the mirror. Check that screws are tight and nails are hammered in completely. Use wall anchors if necessary.
Tips For Successful Mirror Installation
Measure the wall space where you want to install the mirror(s).
Choose a style of mirror that complements your home’s décor.
Purchase the mirror (or mirrors) and any necessary hardware.
If you’re installing a heavy mirror, be sure to use heavy-duty wall anchors.
Follow the instructions that come with the mirror (or mirrors) for proper installation.
Aftercare and Maintenance of Mirrors
To keep your mirrors looking their best, it is important to follow a few simple aftercare and maintenance tips. Here are a few things to keep in mind:
Wipe down your mirrors with a soft, dry cloth after each use. This will remove any fingerprints or smudges.
If you notice any spots or streaks on your mirror, you can clean them with a mild glass railing installers and a soft cloth. Avoid using harsh cleaners or abrasive materials, as these can damage the surface of the mirror.
To prevent water spots from forming, dry off your mirrors with a soft towel after each shower or bath.
If your mirror has an ornate frame, dust it regularly with a soft cloth to keep it looking its best.
Conclusion
Installing mirrors in your home can be a fun and rewarding project. With the right tools, supplies, and steps to guide you through the process, it is much easier than you think. We hope this step-by-step guide has been helpful in guiding you through each phase of installation so that you can successfully install your new mirrors with confidence. Now that you know how to do it properly, go out there and make your home look amazing!